TreeviewCopyright © aleen42 all right reserved, powered by aleen42
How to set up Dlib in the Visual Studio 2013 Back
Introduction
- According to the offical document, we will know that Dlib is a modern C++ toolkit containing machine learning algorithms and tools for creating complex software in C++ to solve real world problems. It is open source software and licensed under the Boost Software License.
Examples of Dlib:
- 3D Point Cloud
- Face Detection
- ...
With the reason that the document about how to compile is too old to use for the Visual Studio 2013, here I have written a document to describe how can we setup Dlib in the version 2013 without CMake.
Proccess
- Version: Visual Studio 2013 (with update 4)
- The most important things to do before the follow steps is to get your own Visual Studio 2013 first.
1. Set up the properties
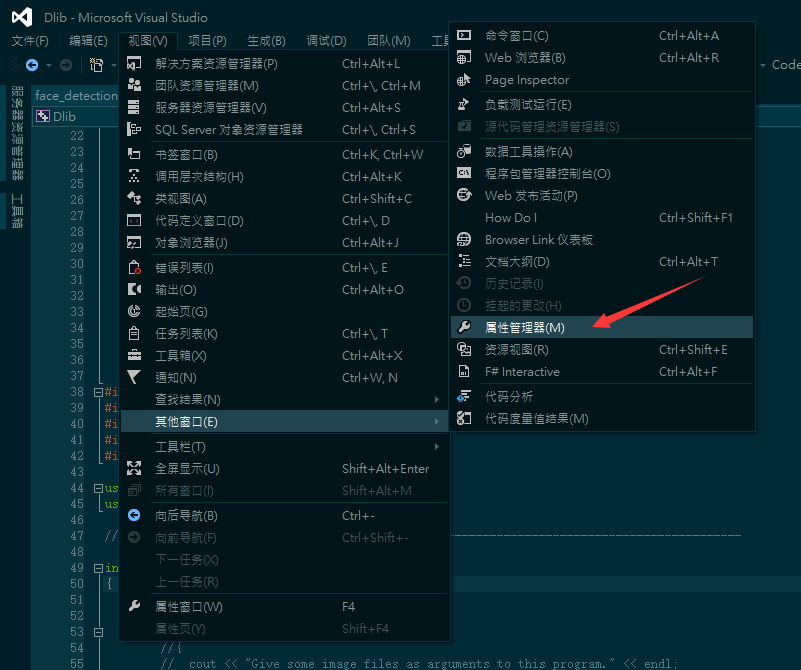
- In this step, you'll need to find out the Property Manager. Here you can see the screen shot of both English Version and Chinese one.
- en:

- zh:
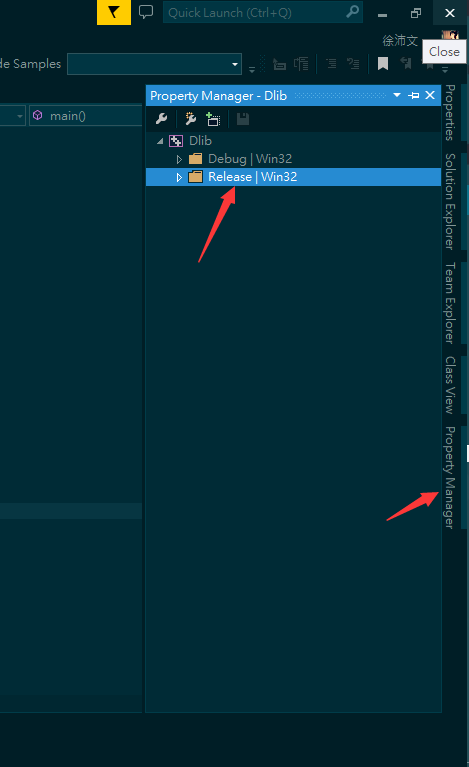
- en:
- And then, you'll see that the manager will appear in your right bars, maybe when it's not for you, you can find it in other bars.
- en:
- zh:
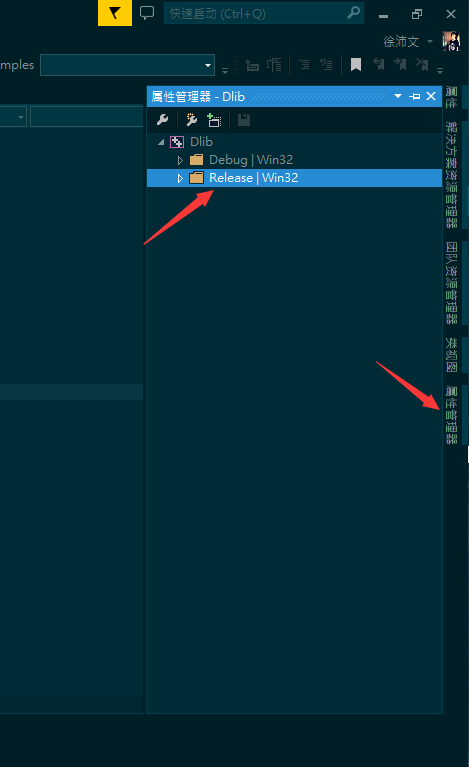
- en:
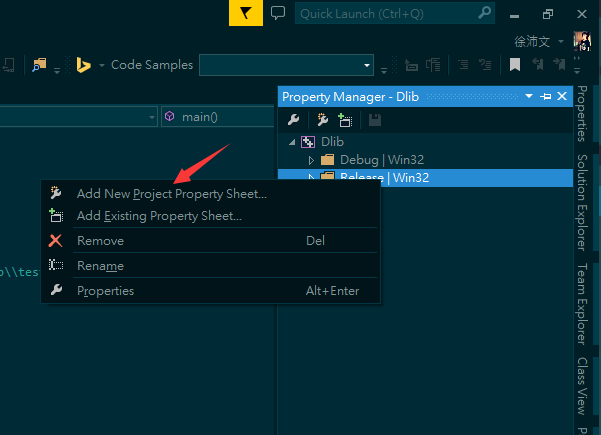
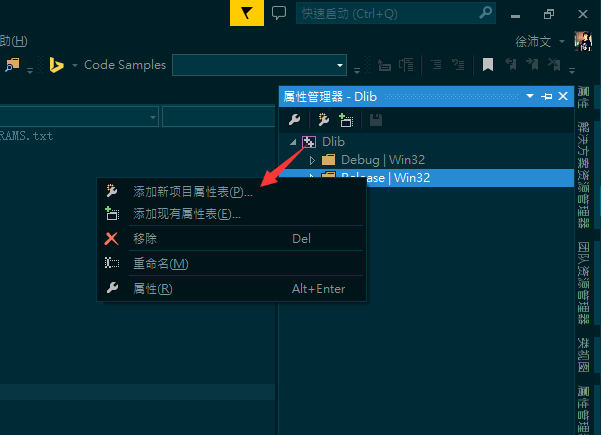
- Open the project, you'll see two directory named Debug|Win32 and Release|Win32. So in the next step, you should click each with right button of your mouse to Add New Project Property Sheet.
- en:
- zh:
- en:
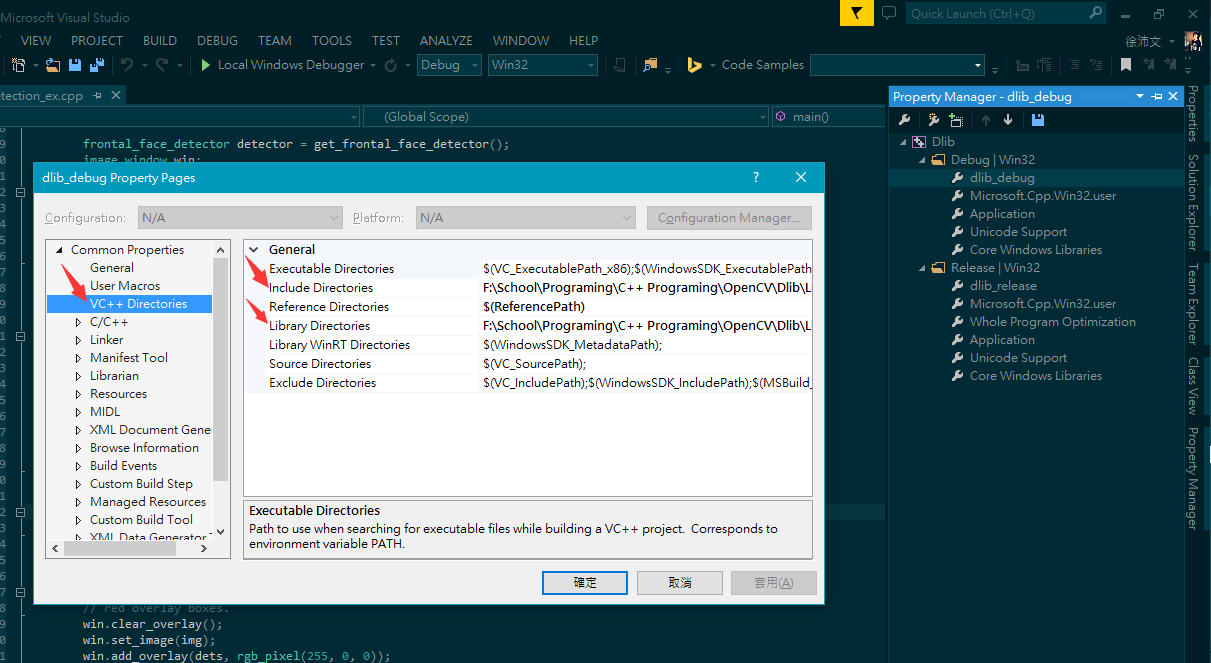
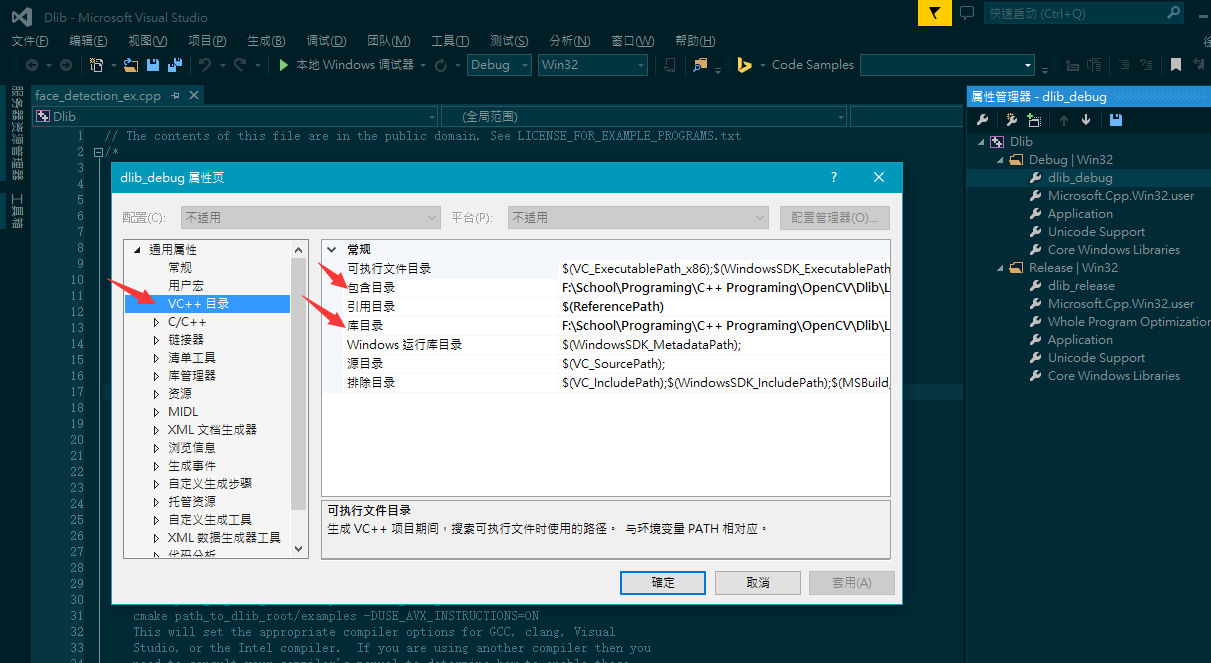
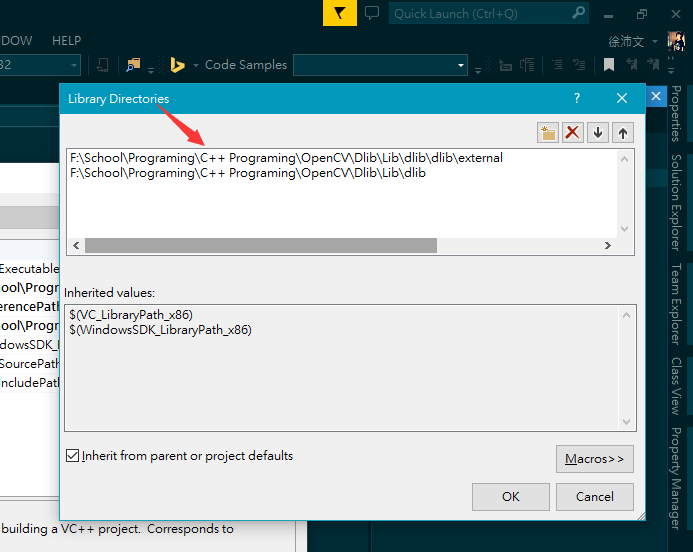
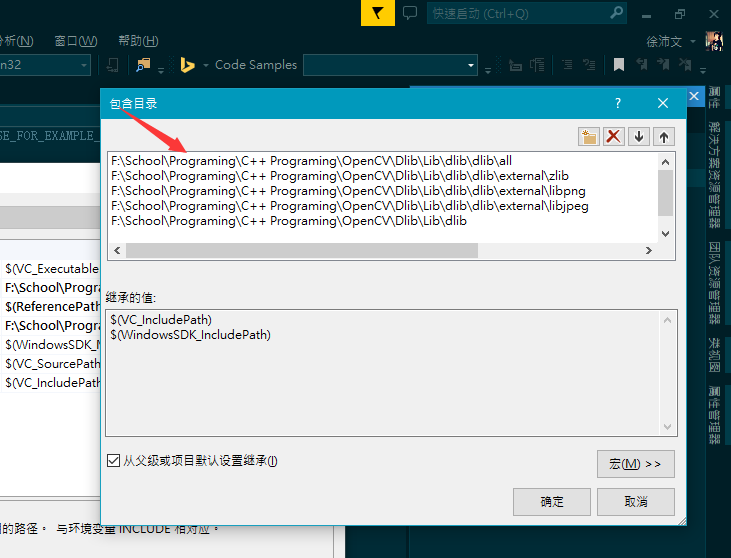
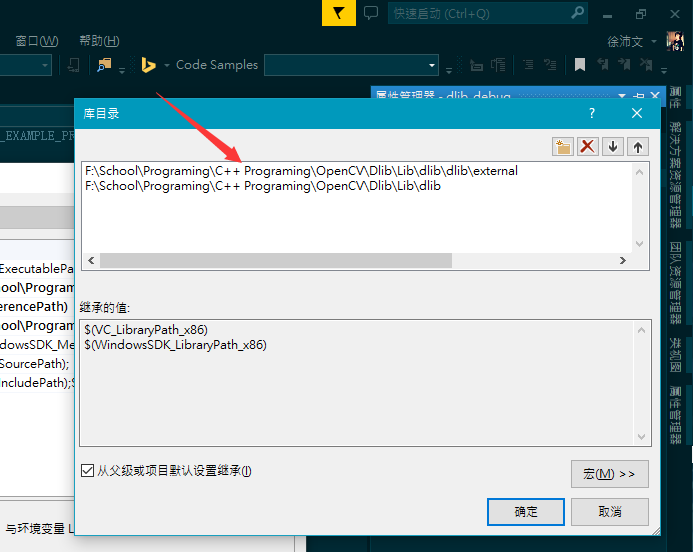
- Here, you can see that I have created sheets for each directory, dlib_debug and dlib_release. What you should do is to find out Common Properties > VC++ Directories, and setup two properties, Include Directories and Library Directories.
- en:
- zh:
- en:
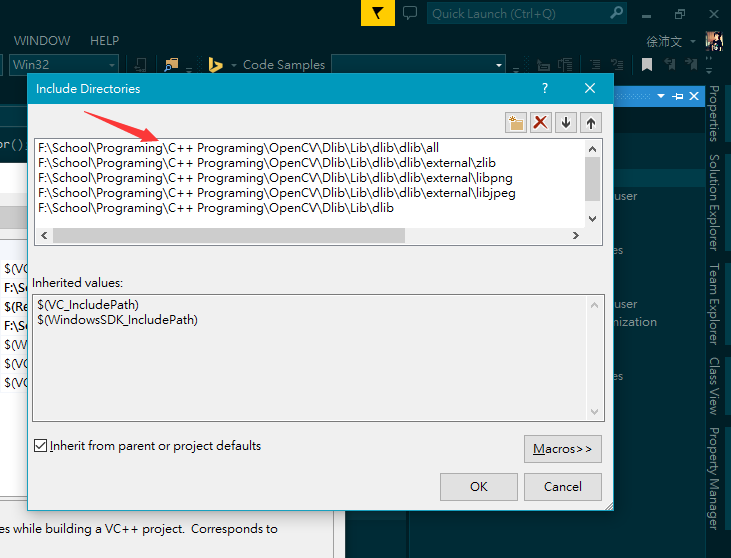
- The path you should set for your own is shown as follows(the path of dlib source files for me is F:\School\Programing\C++ Programing\OpenCV\Dlib\Lib\dlib, and of course you can use relative path):
- en:
- zh:
- en:
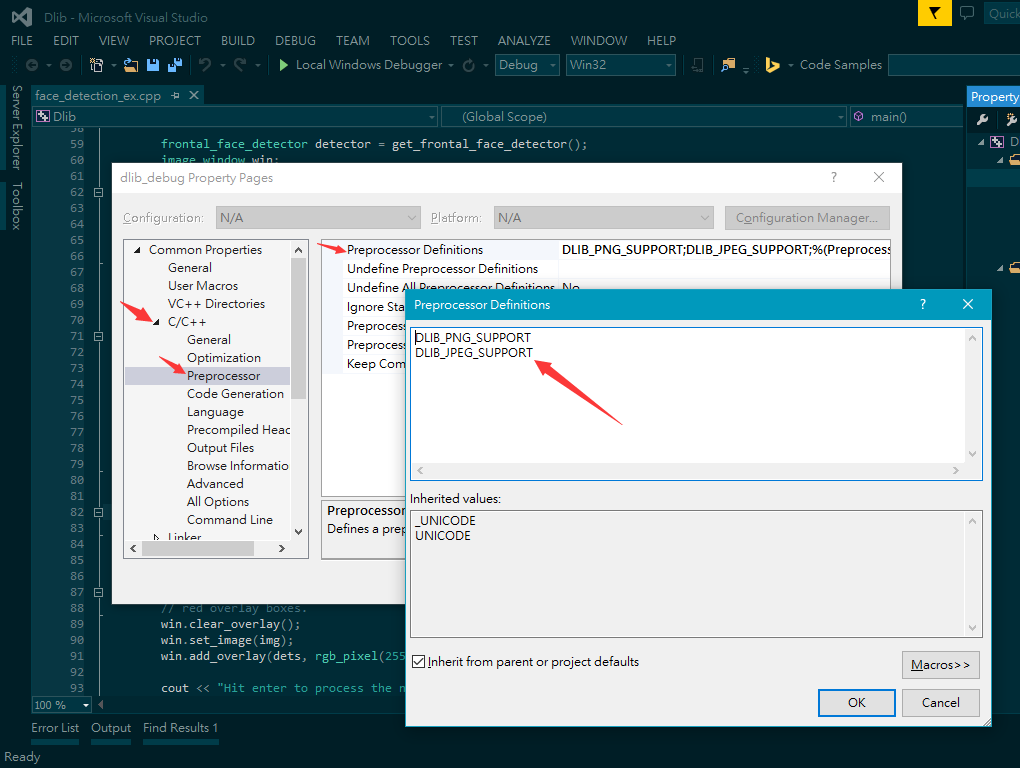
- In additionally, you should set up the preprocessor globaly for all the projects using Dlib.
- en:
- zh:

- en:
- Notice that dlib_release should be setup like dlib_debug.
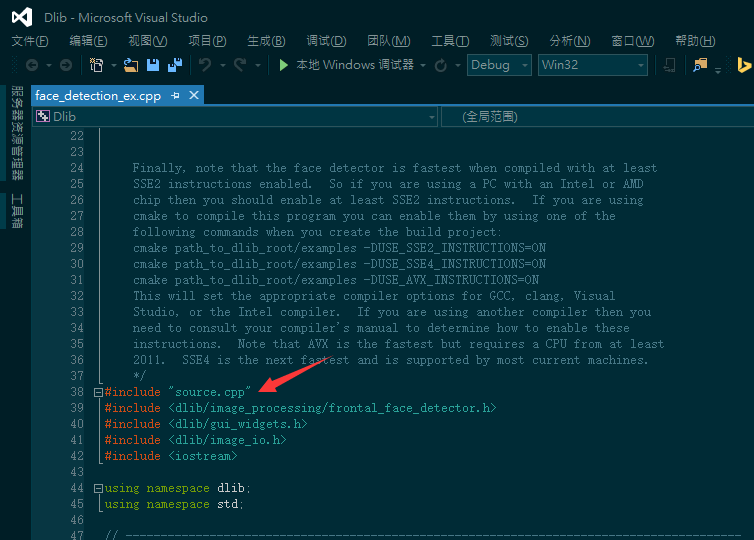
2. Include source.cpp
- For all projects using Dlib, the things you should do before is to include the source.cpp. Without it, Visual Studio will have given out some errors like cannot parse the external link.
- en:

- zh:
- en:
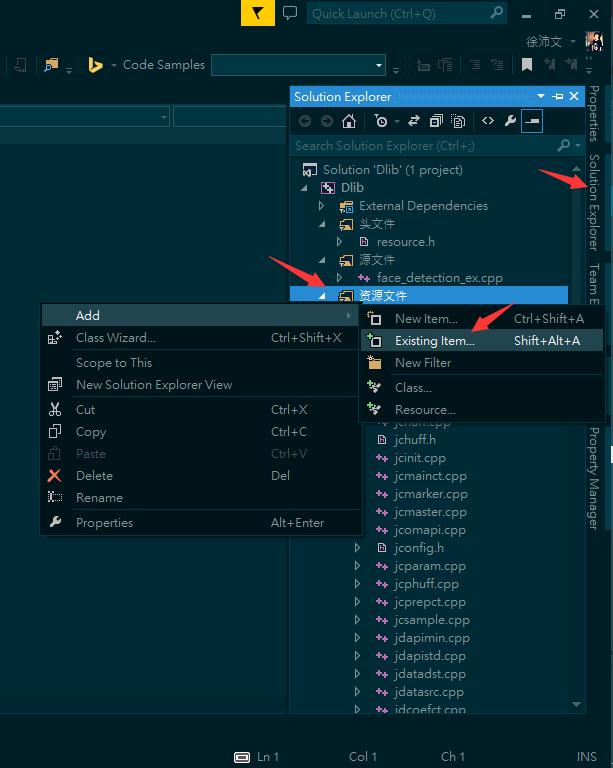
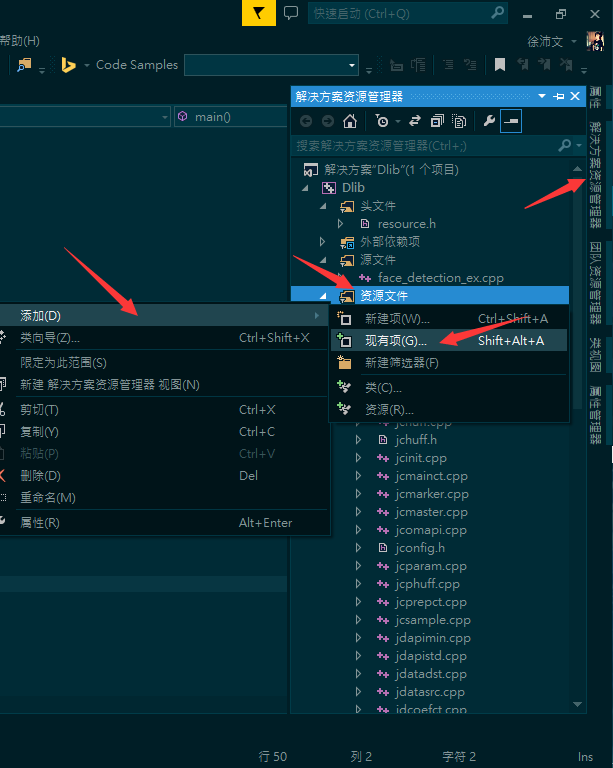
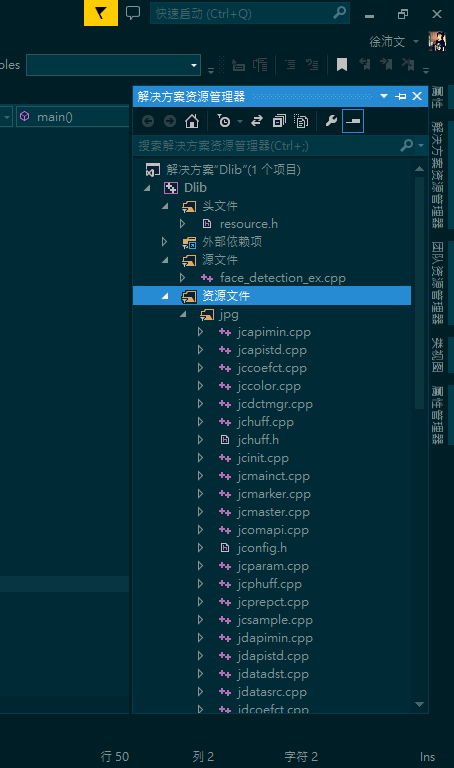
3. Import all the external src files
- The last thing to do is to import all the external file from dlib\external. For clear structures, you can create some directories to distinguish them as what I did.
- Firstly, add existed items to the Source File Directory of your project.
- en:
- zh:
- en:
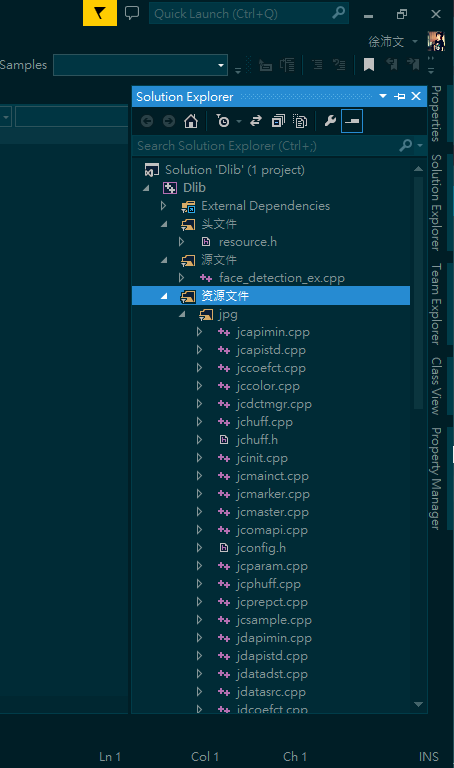
- And then choose all the files from dlib\external to add.
- en:
- zh:
- en:
- Finally, the dlib can be used after all those things have been done.
As the plugin is integrated with a code management system like GitLab or GitHub, you may have to auth with your account before leaving comments around this article.
Notice: This plugin has used Cookie to store your token with an expiration.